Step 3.1: Approving Students
Once a student has completed all their required Clearance Tasks(such as liability forms, site selection, or background checks), they will appear in your queue for final approval.
How to Find Pending Approvals
You can access students waiting for approval in two ways:
- 1The Overview Page: Click into the "Pending Tasks"KPI card at the top of your dashboard for a quick summary.
- 2Program-Wide Tasks: Navigate to the specific Taskstab in the sidebar to view all pending items across your program.
Reviewing Information
Clicking on a student's task will open the review screen. Here, you can see every field the student input and every document they uploaded during the clearance process in one consolidated view.
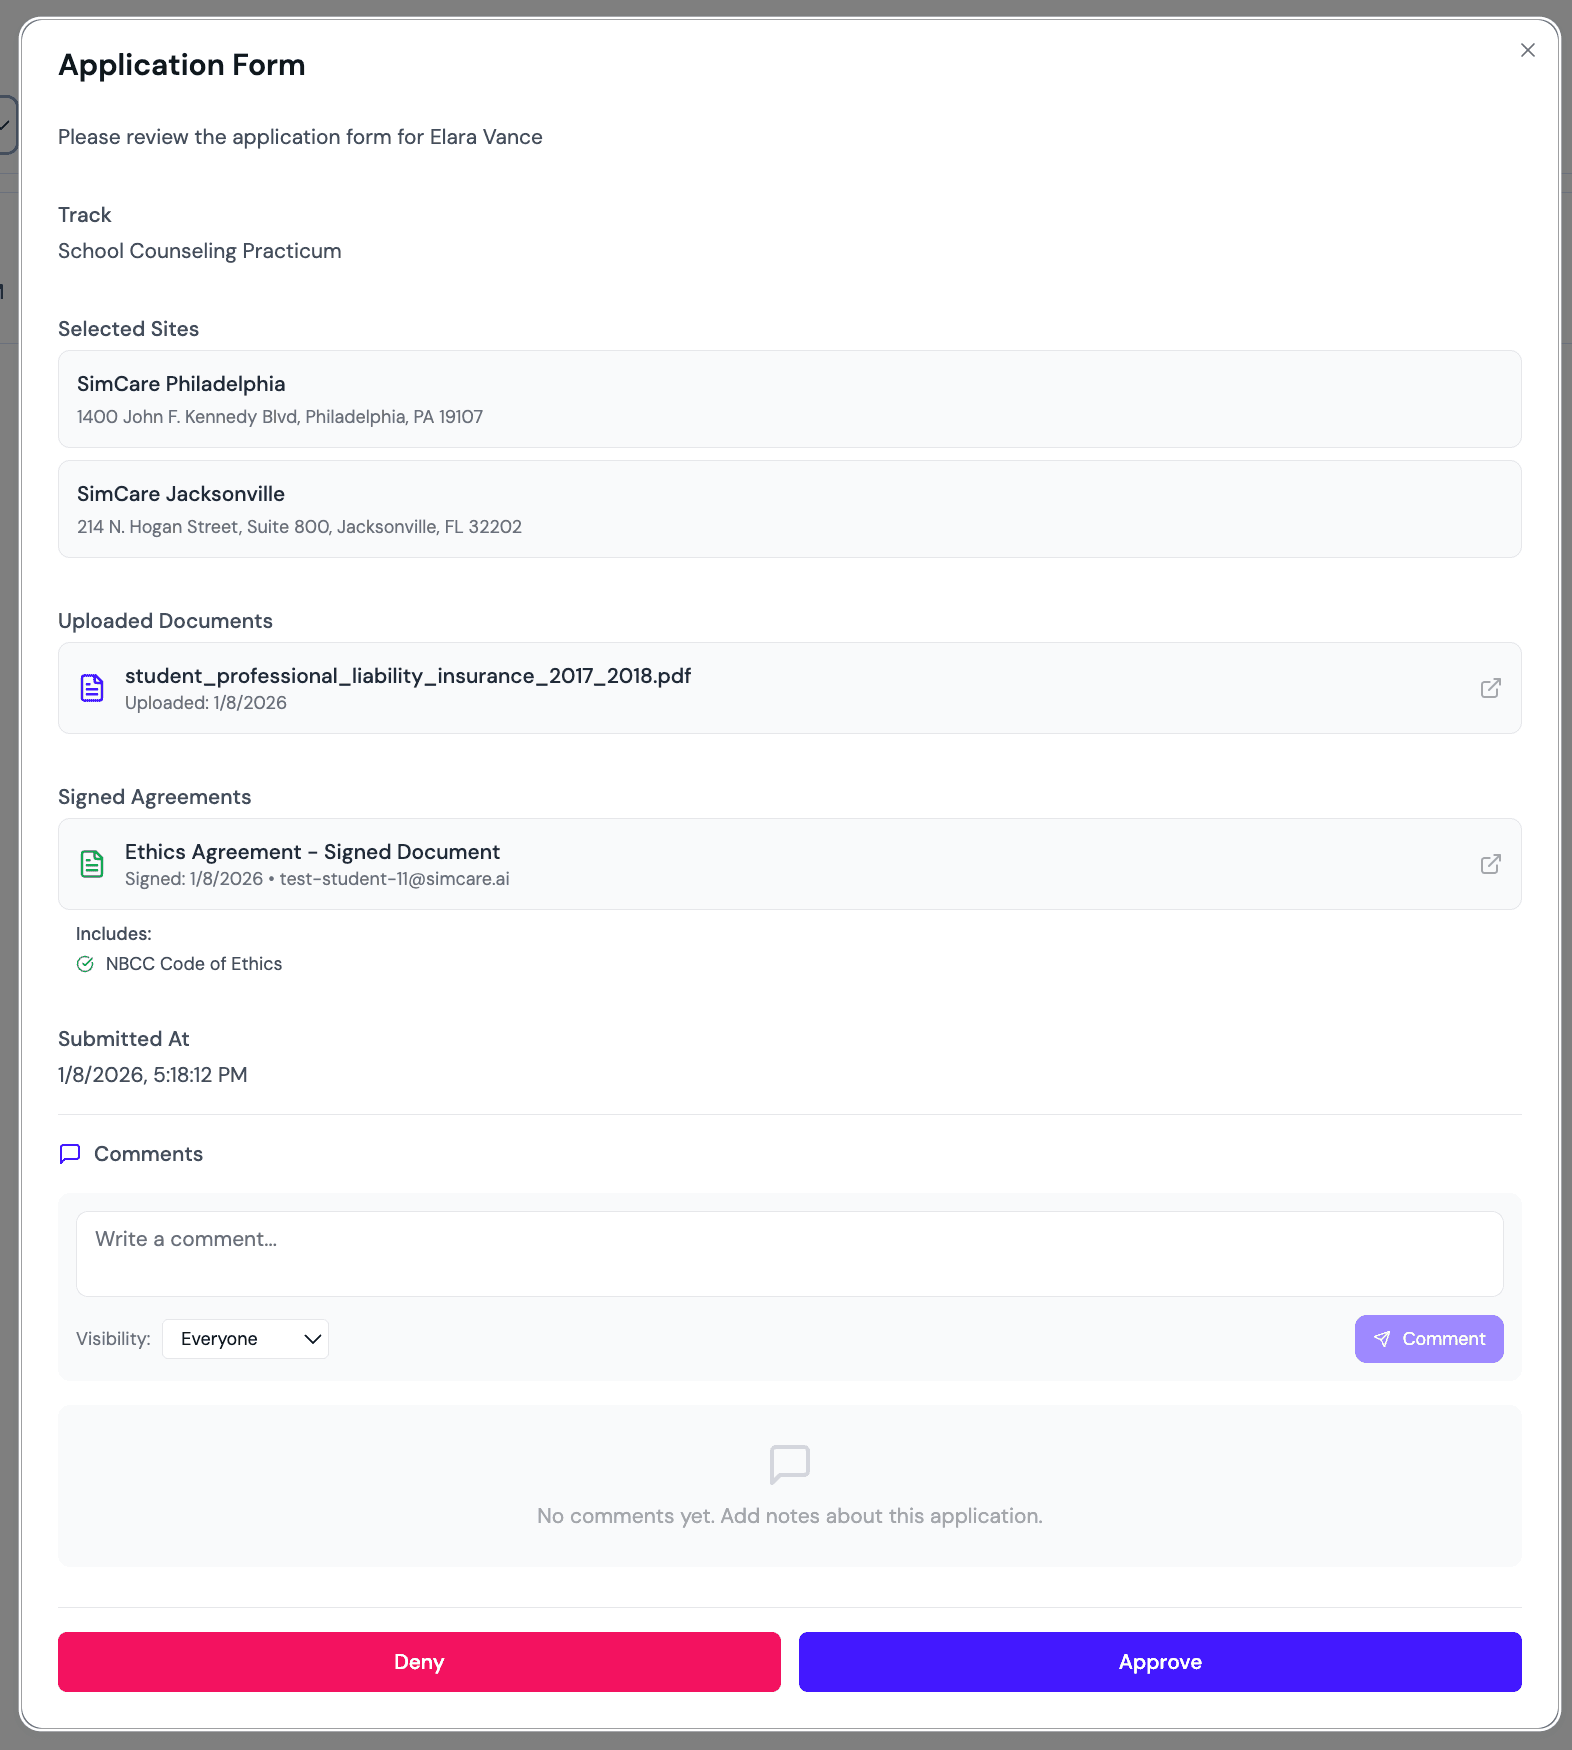
Taking Action
At the bottom of the review screen, you have two primary options:
✅ Approve
This grants the student full access to the platform to begin logging hours and participating in their assigned cohorts.
❌ Deny
If something is missing or incorrect, you can deny the application. When you select Deny, you will be prompted to leave a Note.
💡 Important Note: The student will see your specific feedback the next time they log in. This ensures they know exactly what needs to be fixed before re-submitting for approval.
📝 Next Step: Create and assign tasks for your students. See Step 4: Create & Assign Tasks.